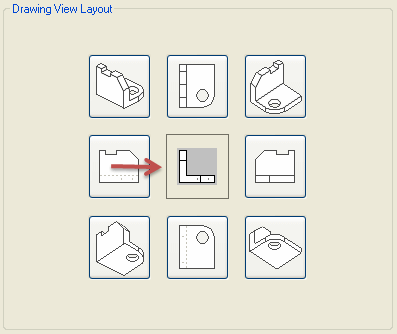
You can use the Drawing View Layout options to choose additional orthographic views based on the selected primary view.
The dialog box displays nine buttons representing orthographic (principal) and pictorial views of the part.
The middle image represents the initial view you selected from the Named Views list in the Drawing View Creation Wizard.

You can select additional views to place on the drawing sheet along with the initial view by clicking one or more buttons representing the view orientations.
Note:
The order in which the view orientation buttons are arranged in the dialog box is based on whether you are using first-angle projection or third-angle projection.
For first-angle projection:

For third-angle projection:

Back
Moves to the previous step.
Next
Moves to the next step.
Finish
Completes initial placement steps and closes the Drawing View Creation Wizard.
At this point, you can either click to place the drawing view on the sheet, or you can change placement options first, using the View Wizard command bar.