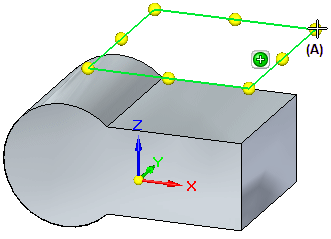
A reference plane is a flat surface that is typically used for drawing 2D sketches in 3D space. Although the size of a reference plane is theoretically infinite, it is displayed at a fixed size to make it easier to select and visualize.
There are two types of reference planes:
Base Reference Planes
Global Reference Planes
The base reference planes are the three orthogonal reference planes at the origin of a new part or assembly document. They define the Top (xy), Right (yz), and Front (xz) principal planes.
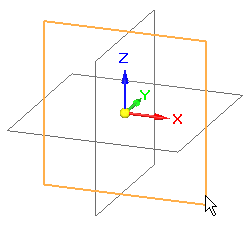
You can use the base reference planes to construct sketch-based features. You can also use them to position a part in an assembly or to define the x-axis for a new reference plane you define using a part face. You can display and hide the base reference planes individually or as a group using PathFinder.
Note:
In a synchronous model, the base reference planes are hidden by default. The preferred workflow for starting new parts is to draw on one of the principal planes of the base coordinate system. For more information, see Drawing sketches of parts.
When you create global reference planes, you specify the orientation and position of the new reference plane relative to an existing reference plane or a planar face on a part. For example, you can specify that the new reference plane is coincident to a part face (A).
After the new coincident reference plane is created, the steering wheel (B) and Move command bar (C) are displayed on the new reference plane, in case you want to move the reference plane to a new location.
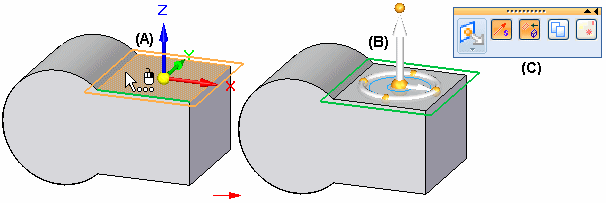
For example, you may want to move the reference plane to be parallel and offset from the existing plane or face.
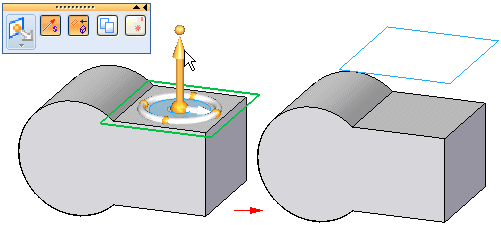
You can use global reference planes to construct a complex feature that requires several sketches, such as a lofted feature, or to position a part in an assembly. You can display and hide global reference planes individually.
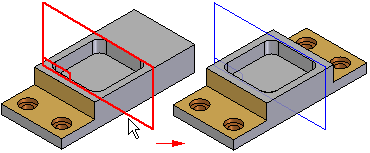
You can also use global reference planes as a mirror plane when mirroring features.
You can change the size of a reference plane in several ways. You can change the size of the base reference planes by specifying a new size on the General tab on the Options dialog box. The size you specify is applied to all three of the base reference planes. This option is useful when you are setting up custom template files and the default reference plane size is either too large or too small for the types of parts your company typically models.
You can dynamically edit the size of a global reference plane by dragging the reference plane handles (A) located at the endpoints and midpoints of the reference plane. To display the handles for a global reference plane, you click the Resize command on the command bar when a global reference plane is selected.
