For block tables, the Options tab is where you specify item numbering and what type of list to generate in the block table.
Item Numbers
Start with item number
Specifies the first number for the item numbers in the block table.
Increment by
Specifies a positive integer as the item number increment value.
Mark unballooned items
Specifies that items that are not ballooned are marked in the block table. You can change the default marker, which is an asterisk (*).
Balloons are not added to parts that are not visible on the sheet or in the selected drawing view. Nor are they added when an Auto-Balloon option on the Balloon tab limits duplicates.
Renumber items/balloons according to sort order
Renumbers the list entries and balloons based on the sort criteria you specify, using the start number and the increment value.
Use this option when items are added to or deleted from the block table.
Note:
If this option is selected, you cannot edit the item numbers on the Item Number tab.
List Options
The following options specify the primary type of block table to produce: a (master) block list or a block view list. Within these two basic types of lists, the List Options also determine how master blocks, named block views, block occurrences, and nested blocks are displayed in the block table. See the Block terminology section in the help topic, Using blocks, for descriptions of each of these types of blocks.
Block only list
Generates a list of the quantities of every master block that is referenced by the table.
In a Block only list table:
Named views are considered to be occurrences of the same master block. No block occurrences are listed, but they are counted to determine the quantity of each block.
Block labels cannot be shown in a block-only list.
Block properties can be shown by selecting and inserting them on the Columns tab.
Example:
Every master block (Block1, Block2, Block3) is listed in the Block Name column.
The Block View Name column is not used. You can remove the Block View Name column form the table by deleting it from the Columns list on the Columns tab in the Block Table Properties dialog box.
|
Block only list |
|||
|
Item Number |
Block Name |
Block View Name |
Quantity |
|
1 |
Block1 |
1 |
|
|
2 |
Block2 |
4 |
|
|
3 |
Block3 |
1 |
|
Block view list
Generates a list of all of the master blocks, plus all occurrences of named block views.
Example:
This example shows the default column headings as they are generated in the Block view list table. The master blocks are identified in the Block Name column. The block views are identified in the Block View Name column. When no block view exists, then the master block name is repeated in the Block View Name column.
|
Block view list |
|||
|
Item Number |
Block Name |
Block View Name |
Quantity |
|
1 |
Block1 |
Left View |
1 |
|
2 |
Block1 |
Right View |
1 |
|
3 |
Block2 |
Block2 |
4 |
|
4 |
Block3 |
Block3 |
1 |
You can use the following options to change the way the data is presented in the block view list.
List block on separate row
Specifies that master blocks and named block views are listed on separate rows in the table. The master block rows introduce the block view rows in the table.
Example:
The master block name, Block1, is displayed on the row preceding the block view rows. It is not repeated on the block view rows.
|
List master block on separate row from block views |
|||
|
Item Number |
Block Name |
Block View Name |
Quantity |
|
1 |
Block1 |
2 |
|
|
2 |
Left View |
1 |
|
|
3 |
Right View |
1 |
|
|
4 |
Block2 |
Block2 |
4 |
|
5 |
Block3 |
Block3 |
1 |
Use same item number for all block views
Specifies that all block views of the same master block receive the same item number.
Example:
The same item number (1) is assigned to the two block views (Left View, Right View) of the master block, Block1.
|
Use the same item number for all views of the master block |
|||
|
Item Number |
Block Name |
Block View Name |
Quantity |
|
1 |
Block1 |
Left View |
1 |
|
1 |
Block1 |
Right View |
1 |
|
2 |
Block2 |
Block2 |
4 |
|
3 |
Block3 |
Block3 |
1 |
Note:
When you select this option, duplicate item numbers are shown in the table, but only the first instance of each item number is shown on the Item Number tab in the Block Table Properties dialog box. All additional instances of the same item number are hidden.
List by block occurrence
Specifies that each occurrence of a master block or block view is reported separately in the table. This results in a quantity of one being reported in the Quantity column.
You can use this option to list all of the block label values assigned to the block occurrences.
Example:
Every occurrence of Block1 is listed in the Block View Name column.
|
Blocks listed by occurrence |
|||
|
Item Number |
Block Name |
Block View Name |
Quantity |
|
1 |
Block1 |
Block1-View1 |
1 |
|
1 |
Block1 |
Block1-View |
1 |
|
2 |
Block2 |
Block2 |
1 |
List block or block view on separate row
Creates a block list or block view list with all block occurrences listed individually. Master blocks are listed on separate rows than their block views. Item numbers are assigned to the block occurrences only. Quantities are reported as occurrence totals on the row containing the master block name.
Example:
If blocks contains labels, you can choose to display the label occurrence values by adding the label columns to the table using the Columns tab in the Block Table Properties dialog box.
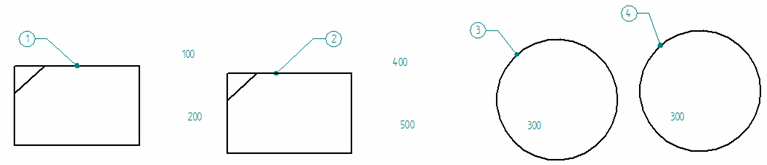
|
Blocks listed by occurrence on separate rows (label names shown) |
||||
|
Item Number |
Block Name |
Label 1 |
Label 2 |
Quantity |
|
Block1 |
2 |
|||
|
1 |
100 |
200 |
||
|
2 |
400 |
500 |
||
|
Block2 |
2 |
|||
|
3 |
300 |
|||
|
4 |
300 |
|||
List nested blocks
Produces a block list that identifies the contents of nested blocks, and specifies whether the nested blocks are displayed in a flat list or in a structured list. Use this option to generate a structured block table, similar to a parts list that mimics the structure of an assembly.
Use the following options to determine how the nested blocks are displayed.
List all blocks separately
Specifies that the resulting table structure is flat, similar to an atomic parts list. All top level blocks and nested blocks are reported in a flat list.
List with nested structure
Specifies that the resulting table lists nested blocks using an indented structure, similar to an indented parts list. The number of levels that the list is indented is based on the nesting of blocks with blocks.
Use level based numbers
Displays level-based item numbers (for example, 1, 1.1, 1.2, 1.3) in nested block lists.
Example:
Selecting another option, Use level based numbers, produces the item number schema shown in the following table.
|
Nested block view list with block labels (and level-based numbers) |
|||||||
|
Item Number |
Block Name |
Block View Name |
Label 1 |
Label 2 |
Label 3 |
Label 4 |
Quantity |
|
1 |
Block1 |
Block1-A |
100 |
200 |
1 |
||
|
2 |
Block2 |
Block2-A |
300 |
1 |
|||
|
3 |
Block5 |
Nested |
2 |
||||
|
3.1 |
Block3 |
B3-Nested |
20 |
5 |
1 |
||
|
3.2 |
Block4 |
B4-Nested |
15 |
30 |
1 |
||
Convert deleted blocks into user defined rows
Prevents item number rows from being deleted automatically when the corresponding block is deleted from the drawing and the block table is updated. You can delete the row manually, if desired.
When this option is unchecked, the list rows are deleted automatically.