The Center Mark command adds a center mark to any circle, arc, ellipse, or in free space. You also can use a center mark to mark keypoints on an element, such as the endpoints and midpoints of a rectangle.
Choose Home tab→Annotation group→Center Mark  .
.
On the Center Mark command bar, select the settings you want to use, and then click to place a center mark on one or more elements.
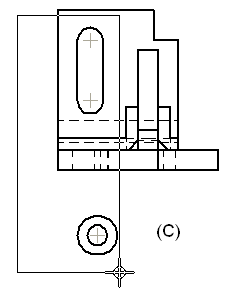
Example:
To place a center mark on a single curved element, select the Horizontal/Vertical option, and then click the element (A).
The center mark appears at the center point of the element (B).

To place center marks on a group of curved elements, click+drag to select the elements (C).

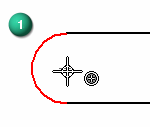
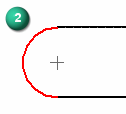
To place a center point on an arc, you can locate the arc and press C on the keyboard to select its center point (1) (2).


To place a center mark in free space:
Create a point with the Point command.
Locate the point when you place the center mark.

To place a center mark that is associative to any keypoint honored by IntelliSketch, such as midpoints and endpoints of arcs and lines:
Click the Keypoint Attachment option on the command bar.
Click the elements at the locations where you want to add the marks.

To place a center mark at an angle:
Select Use Dimension Axis from the Orientation list.
Click the Dimension Axis option on the command bar.
Click a linear element to identify the desired orientation angle of the center mark.
Click the element to which you want to add the mark.

Tip:
You can select elements that are located in multiple views and that are drawn directly on the sheet using click+drag. Only elements that are completely within the selection area will have center marks added to them.
You can change the appearance of the center mark by changing its properties. Select the center mark and then click Properties on the shortcut menu.
You can drag a center mark from one parent element to another using Alt+drag.
You can place center marks at different angles on a single element by changing the orientation of the dimension axis each time you click.
