Use the Pattern Along Curve command  to construct a pattern of elements along a specified curve. You can control how the pattern follows the curve by customizing parameters such as start point and transformation type, as well as occurrence count, spacing, and orientation. You can select features, assembly features, edges, surfaces, or design bodies as the parent elements to pattern.
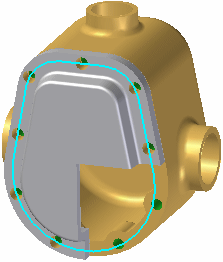
You can pattern the elements along any 2D or 3D curve or model edge. For example, you can pattern a feature (A) along a set of sketch elements (B).

In an assembly, you can pattern assembly features along a curve, which allows you to modify two or more parts in one operation.
The Select option on the command bar allows you to specify what types of elements you want to pattern. To pattern one or more surfaces or edges (model topology) that are part of a surface or solid body, you can set the Single or Chain option. To pattern one or more features, such as a cutout or protrusion, set the Feature option. To pattern a surface or solid body, set the Body option.
Note:
When constructing and editing pattern features, you cannot have more than one element type in a single pattern. For example, you cannot pattern a hole feature, a design body, and a curve in one operation.
The first step in constructing a pattern along a curve is selecting the elements to be patterned. You can select features before or after starting the command. You can select the features in the graphic window or in PathFinder.
When patterning other elements, such as edges, surfaces and curves, or design bodies, you must start the command, set the Select option on the command bar, then select the elements you want to pattern in the graphic window.
The Select option allows you to specify what types of elements you want to pattern. To pattern one or more surfaces or edges (model topology) that are part of a surface or solid body, you can set the Single or Chain option. To pattern one or more features, such as a cutout or protrusion, set the Feature option. To pattern a surface or solid body, set the Body option.
The name in PathFinder indicates whether you constructed a pattern using features, design bodies, or model topology (surfaces or edges).
After you select the elements, you can select any 2D or 3D curve or edge to pattern them along. Use the Select option to choose Single or Chain, and click the curve or edge.
You can control the number and spacing of occurrences with the Pattern Type, Count, and Spacing options. When the Pattern Type is set to Fit, the pattern operation places the number of occurrences specified by the Count option, equally spaced. When the Pattern Type is set to Fill, the pattern operation places as many occurrences as will fit on the curve, with the distance specified by the Spacing option between each occurrence. When set to Fixed, the pattern operation places occurrences using both the Count and Spacing options.
After you have configured the number and spacing of occurrences, select the anchor point. The anchor point is the point where the pattern will begin. Use the dynamic arrow on the anchor point to select the direction in which the pattern will go. You can use the Offset option to select a distance by which the pattern is offset from the anchor point.
You can customize the transformation and rotation of the pattern to better capture your design intent. You can specify that occurrences be placed in the pattern linearly, keeping the same orientations throughout the pattern. Or, you can specify a transformation that will change the orientations of the occurrences depending on the input curve or a specified plane.
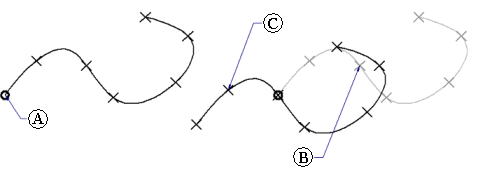
The reference point is the point in the pattern at which transformation begins. By default, the reference point is the anchor point (A). To select a difference reference point, click the Reference Point button on the command bar and click a new point on the pattern (B). The pattern transforms to the new position (C).
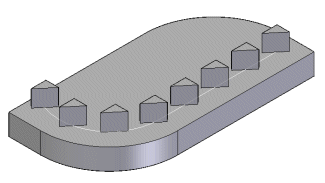
A linear transformation orients occurrences based on the orientation of the elements being patterned.
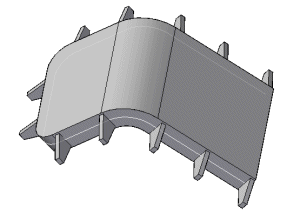
A full transformation orients occurrences based on the input curves.
A transformation from plane projects the initial occurrence and a target occurrence onto a plane, where a measured angle defines occurrence orientation.
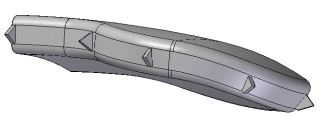
You can also use the Rotation Type control to specify whether the input feature position or input curve position determines occurrence placement.
You can suppress occurrences in patterns along curves with the Suppress Occurrence button. After you click the Suppress Occurrence button, click the occurrence points for the occurrences you want to suppress. You can suppress individual occurrences, or you can use a fence to suppress adjacent multiple occurrences.
You can insert occurrences in patterns along curves with the Insert Occurrence button. After you click the Insert Occurrence button, click a keypoint to insert an occurrence. Use the Offset option to control its offset.
In the Assembly environment, you can pattern assembly features, such as holes, cutouts, and revolved cutouts. You can specify which parts are included in the pattern feature. If you add parts to a pattern feature which were not in the parent feature, a message is displayed to instruct you the parts must also be added to the parent feature.
For more detailed information on constructing assembly-based features, see the following Help topic: Assembly-Based Features.
Note:
You can only pattern assembly features that were created within the current assembly. You cannot pattern assembly-driven part features.
You can pattern multiple elements in one operation.
If the Fast option fails, click the Smart option on the command bar.
You can suppress individual feature occurrences in a pattern along a curve.
You can insert individual feature occurrences into a pattern along a curve.