When modifying fittings and pipes, you can:
Replace a fitting with a fitting from the standard parts library.
Replace a fitting with a fitting from outside the standard parts library.
In PathFinder or the graphics window, click the fitting to edit.
On the command bar, click the Edit Fitting button  .
.
Note:
You can also right-click the fitting and choose Edit Fitting.
Click the Flip Fitting button  .
.
Click the Preview button.
Click the Finish button.
In PathFinder or the graphics window, click the fitting to edit.
On the command bar, click the Edit Fitting button  .
.
Note:
You can also right-click the fitting and choose Edit Fitting.
Click the Replace Fitting -- Select from Standard Parts Library button  .
.
The Standard Parts dialog box displays a list of valid replacement fittings.
Select the replacement fitting and click Select.
Click the Preview button.
Click the Finish button.
In PathFinder or the graphics window, click the fitting to edit.
On the command bar, click the Edit Fitting button  .
.
Note:
You can also right-click the fitting and choose Edit Fitting.
Click the Replace Fitting -- Browse for Fitting button  .
.
On the Pipe Route dialog box, select the replacement fitting and click Open.
Click the Preview button.
Click the Finish button.
In PathFinder or the graphics window, click the fitting to edit.
On the command bar, click the Edit Fitting button  .
.
Note:
You can also right-click the fitting and choose Edit Fitting.
Click the Edit Fitting Alignment button  .
.
Use the Next Alignment button ![]() and Previous Alignment button
and Previous Alignment button ![]() to properly align the fitting.
to properly align the fitting.
Click the Accept button  .
.
Click the Preview button.
Click the Finish button.
In PathFinder or the graphics window, click the fitting to edit.
On the command bar, click the Edit Fitting button  .
.
Note:
You can also right-click the fitting and choose Edit Fitting.
Click the Penetration Cut button  .
.
Click the Preview button.
Click the Finish button.
In PathFinder or the graphics window, click the pipe segment you want to edit.
On the command bar, click the Edit Pipe button  .
.
Note:
You can also right-click the fitting and choose Edit Pipe.
Click the pipe path you want to modify.

On the Piping Attributes dialog box, make the appropriate changes, and then click OK.
Click the Preview button.
The Piping Route warning indicates that the fitting is now invalid because of the change you made. You can use the dialog box to zoom to the invalid fitting, select the fitting from a standard parts library, browse for the new fitting, or cancel to replace the fitting at a later time.
On the Piping Route warning dialog box, click Browse.
On the Pipe Route dialog box, select the replacement fitting and click Open.

Click the Preview button.
Click the Finish button.
In PathFinder or the graphics window, click the fitting to edit.

On the command bar, click the Edit Fitting button  .
.
Note:
You can also right-click the fitting and choose Edit Fitting.
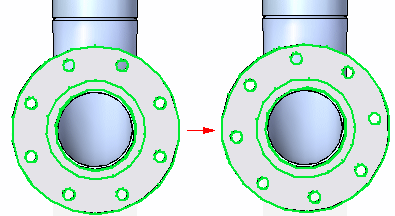
In the Orientation box, type the amount you want to rotate the fitting, and then press Enter.
Click the Preview button.
The fitting rotates to the new position.

Click the Finish button.